How to Sharpen Serrated Knives: 5 Tips + 3 Mistakes Everyone Makes
Are you interested in learning how to sharpen serrated knives? We'll explore how to sharpen a knife, some common mistakes to avoid, and what are the sharpest, highest quality knives on the market.
How to Remove Rust From Stainless Steel Knife
Over time, you will notice rust forming on your knife, and it is crucial that this is removed. As your cleaning guide, this article will tackle removing rust from stainless steel knives and which i...
How to Care For and Maintain Your Kitchen Knives? (8 Mistakes to Avoid)
So how to maintain kitchen knives correctly? It needs to do the care job according to the different materials (stainless steel, carbon steel, alloy steel, ceramic) and usage of them. Keep your kitc...

How to Clean Carbon Steel Woks
Carbon steel woks are a staple in Asian cooking. They're light, easy to use, and non-reactive with many spices. The carbon steel material can withstand high temperatures and oil splatter. Their in...
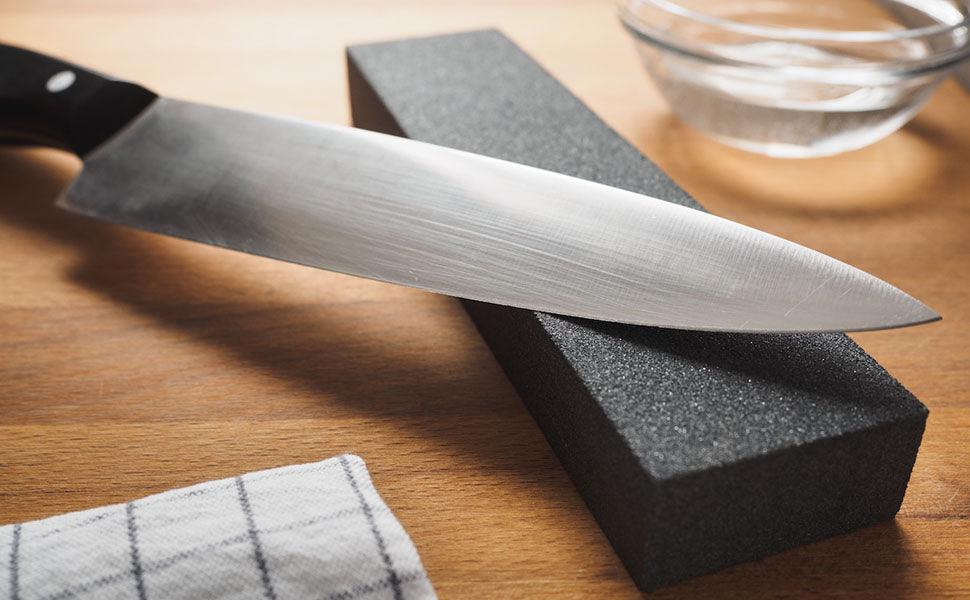
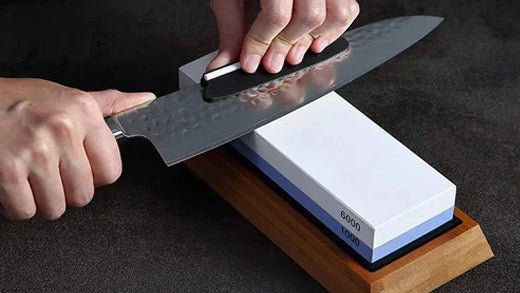
Everything You Need to Know About Knife Sharpening
As you can see, sharpening knives is an easy task. All you have to do is put in a little effort and learn how to sharpen your knives properly. Sharpeners come in different shapes and forms. You can...

Has the question ever popped into your mind while cooking whether you can place your pan into the oven or not? There must have been times when a recipe in your cookbook required you to cook one pa...
How To Extend the Life of Your Nonstick Pan
Nonstick pans rarely survive their first trip to the dish pit since the person cleaning them is likely to take a ball of steel wool to them and very quickly ruin their lovely nonstick coating. Y...

