Investing your time in making good-tasting bread requires skill, various quality ingredients, and an excellent baking oven. Baking your loaves in a dutch oven is the perfect way to begin your cooking journey. Dutch ovens are investment cookwares you should have in your kitchen.
With this kitchenware, you are not limited to cooking unique stews, sauces, or soups but can also create the best crispy golden loaves you will continuously crave for. Step up your A-game and finish this article to start kneading your dough straight in your dutch ovens!

How to Bake Bread in a Dutch Oven
Before anything else, let us get to know first the star tool of bread baking. Dutch ovens are used in various ways, such as frying, steaming, and making stews and soups. However, its function is not limited to those cooking methods. These cookwares are also for use in baking your favorite staple food. If you are not a kitchen bystander or a baker in your house and you don't know what a dutch oven is, then stop reading this for a while and look for this cookware description in your kitchen.
Dutch Oven does not look like the typical oven you imagine. Imagine a stockpot with a broader base, lidded cooking pot for heavy-duty use on a stovetop or oven. Its thick walls are ideal for caramelizing and even add a browning effect to whatever recipe you are cooking.
It comes with a heavy lid and short handles on both sides for a more effortless transfer of food and to maintain a balanced hold in your cooking pot. With this description, you might think, how can this cookware make a good-tasting bread without even having similarities with the typical ovens we have. Fret not because here's how.
1. Prepare your dough
Some people find the limited size, space, and shape a dutch oven can offer. Since the dough follows the pot's design, you can only shape your dough in two similar ways-- oval and round. After this step, give your dough a nice cold rest to give it ample time to rise.
Since yeast does not trap the flavor of the dough a room temperature, giving your dough rest in the fridge will help ease this problem. Ideally, give it an overnight sleep in your fridge for better results. Once you take out your dough, shape it bases on your liking.
The keys are gentleness and right rolls and folds for a round shape. Put your dough on a heavily floured flat surface and lightly press it to a 1-inch thickness. Gently stretch your dough by folding 1/3 of it to the center. Stretch the right side out, fold, then do the same on the other side.
Roll your dough away seam side down, turn it 90 degrees, then pull again until you form a French-shaped bread ball. In a bowl heavily dusted with flour, place your round shape dough seam side up, then loosely cover it with a towel for about 1 hour and 30 minutes.
If you wish for an oval-shaped dough, roll, fold, and shape your dough the same way and thickness as you did with the round one. Gently stretch your dough by folding 1/3 of it to the center. Stretch the right side out, fold, then do the same on the other side.
Roll your dough away seam side down, and cup the dough around with both hands into an oval shape. Turn it 180 degrees, then pull again until you form your smooth desired shape. In a bowl heavily dusted with flour, place your round shape dough seam side up, then loosely cover it with a towel for about 1 hour and 30 minutes.
2. "Score" your dough for the best results
Get your sharp blade, a knife, a razor blade, or lame, then stroke a shallow 1/4 to 1/2 inch deep slit in the middle of the dough. We "score," slash or slice the dough to push the gases in a specific direction during the baking process. This is to prevent creating an unpleasant bubbled top and, of course, to make a tasty loaf.
3. Preheating and Baking
When your dough has less than 30 minutes left to rise, preheat the empty dutch oven for about 20 minutes at a temperature of 500F. Be sure to heat it with the lid on top, and don't go over 30 minutes of preheating to avoid scorched loaf bottom. The humidity will form steam that will keep the dough moist. Since the container is sealed, the dough will continue rising in its initial baking stages. The result of the score will come out beautifully during the baking process.
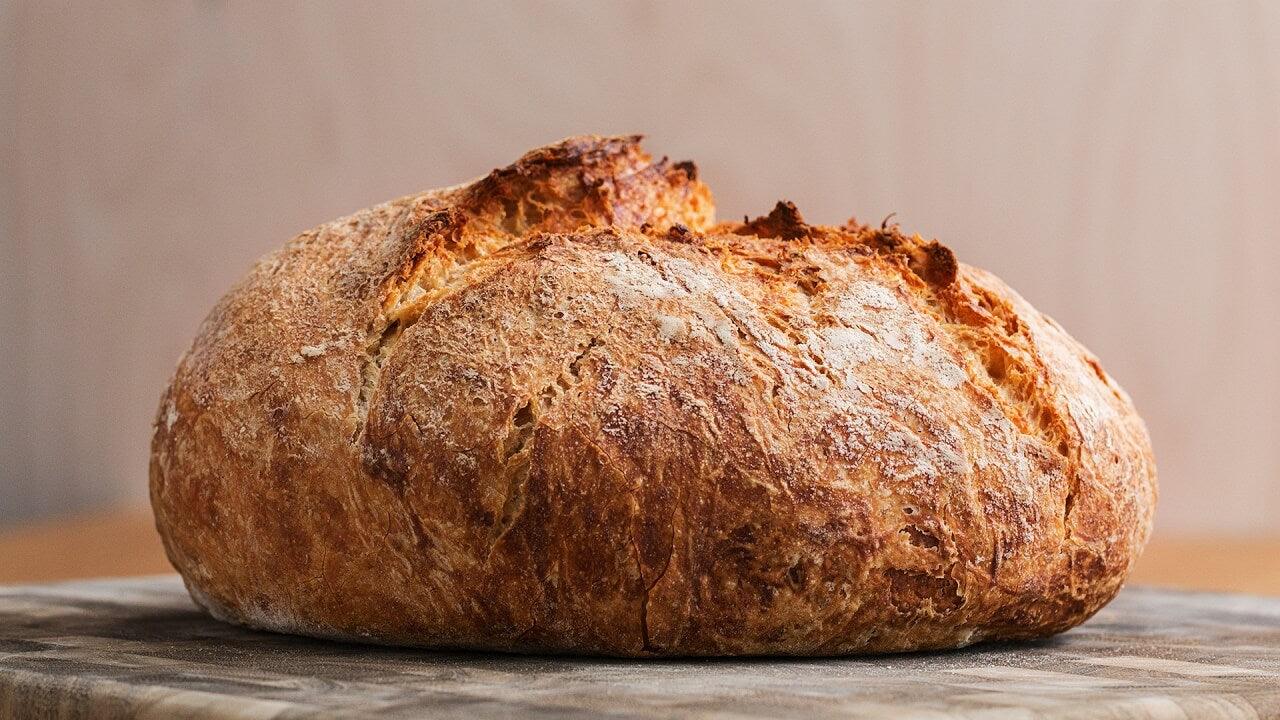
Apply an ample amount of vegetable oil coating and flour as you bake. Bring your dough over the pot, put it seam side down, and shake it to settle the dough evenly unto the pot. Bake for not more or less 25 to 30 minutes with the lid, and another 5 to 10 minutes or until it creates a nice brown color without the top. Remove the loaf out and let it cool before slicing.

Why Bake Bread in a Dutch Oven or Combo Cooker?
The Dutch oven provides an experience like a professional baker. Because of the material of the Dutch oven, from its container up to the lid that traps the steam from the bread upon cooking process, heat is conducted evenly. It creates a temperature-stable condition which makes it suitable for baking.
The trapping of the moisture inside the pot allows the bread to arise completely, enhances the pleasing golden brown color of the end piece of bread, and provides a glossy shine exterior. A closed pot makes bread-baking simple and more efficient.
Additionally, to produce a crispy bread crust, steaming is the key. Steam is a crucial element for baking loaves in the pot. Without it, the dough will expand, dry out, or bake too quickly while forming a stiff crust which is not what we want. Allowing steam to bake your bread will slow the pacing of crust formation and increase the volume of the loaf for the reason that it will enable the dough to expand before it sets.
Unlike the professional oven, the steam comes out due to its design or feature. With a Dutch oven, you will only need a lid to let the water from the dough become steam and cook the bread out of it.
Lastly, Dutch ovens provide an elegant, rich color for slices of bread. The striking color of the bread is sometimes why it's mouthwatering. The process "unlocks" sugars that can enhance the color appearance of the end piece of bread during baking.
The steam also allows starch that will form a narrow layer over the bread which will create a beautiful shine on its crispy exterior. This process of starch gel is called gelatinization. Do not overly thicken your starch gel, or you'll possibly get a burned result.

General Baking Periods and Temperatures
Remember that environmental conditions can affect the pot's temperature, so you need to adjust the heat accordingly. Preheating for about 30 minutes to an hour at 450F could be with a lid or without is an essential process upon baking in a Dutch oven. You must consider checking the brand of your pot since each manufacturer designs dutch ovens differently.
As you proceed with the baking process, use oven mitts to load your doughs in and into the oven. Bake the dough covered for 20 minutes at 450F. After that, remove the lid and let it cook for another 10 to 20 minutes longer until you're one. Your loaves should be about 205F when cooked. You may use a temperature checker to know if it registered the right temperature.

How to Prevent Burning the Bottom of Your Loaves
Baking or cooking at high temperatures is one of the main reasons why your loaves burn. Generally, if you bake in a dutch oven, it will always produce darker bottoms regardless of how you try to prevent it. What you should do is avoid baking on your baking stone directly. Extensive heat after preheating will burn the bottom of the dutch oven quickly; as a result, it will burn your loaves as well. This is why you should check and modify temperature consistently.
The brand of your dutch oven matter here. If you have already tried baking or cooking in it and notice that it burns quickly, drop down your preheating temperature and time. For example, for a suggested hour of preheating at 450F, you may reduce it to 45 minutes at 425F (218C). Adjust the temperatures to bake your loaves without undercooking or burning the bottom.
Moreover, you can try a blocker such as a baking sheet or baking stone that will help insulate your dough. When you place your pot near the bottom of the oven, it gives out extensive heat for your dough. The use of insulators will balance the thermal mass between your dough and the element responsible for heating in your oven. Put your dutch oven in between racks-- the insulators at the bottom rack, and another one is placed above the middle rack.
Another method you can use is by utilizing coarse cornmeal or wheat bran. This adds an extra thin insulation layer between your Dutch oven and dough. Sprinkling an ample number of coarse corn after preheating and before you put your dough will help absorb heat from the pan.
Another way to prevent burning the bottom loaves is to double your parchment paper. Put two layers of parchment paper on top of your proofing basket with the dough. Place the parchment papers into the dutch oven, and slash the dough before baking the bread. The additional layer will help your dough insulate.
Dust coarse corn on your pan before dragging the parchment with the dough. Of course, check your parchment paper's quality to avoid scorching problems as you bake.
Advisable Combo Cookers and Dutch Ovens
The essential requirement a Dutch oven must-have for a great baking experience is that it is oven-safe and has a tight lid. You must check in with your manufacturer to ensure the preheating safety methods of your pot since some cookwares like these are not compatible when preheated empty.
Below are recommended cookwares you can check to give you an idea upon which combo cookers and Dutch ovens to purchase.

5-Quart imarku Enameled Cast Iron Dutch Oven Red/Blue Color
If you are searching for the best among all other Dutch ovens on the market, the 5-quart imarku Enameled Cast Iron Dutch Oven in Red or Blue is your choice.
This cookware is a versatile combo cooker that can be used for several cooking methods, such as boiling stews, sauteing veggies, and frying meats, aside from its bread baking capabilities. With its enormous 5-quart capacity and size of 17.91" by 13.82" by 7.72", you can surely feed many guests and family members on any occasion you want.
This Dutch oven is made out of a crack and scratch-resistance enameled cast iron durable enough to distribute heat in your dish evenly and to last a lifetime quality performance. Imarku's Dutch oven comes with a self-basting lid that circulates steam within the cookware to bring out the dish's most flavorful taste and a wide ergonomic handle for sturdy grip upon cooking.
You can also effortlessly clean your enamel surface without seasoning your cookware. It is compatible with several heat sources such as gas, electric, ceramic, and induction cooktops. With France's premium materials, indeed, your cooking experience with imarku's Dutch oven is the finest you can experience.

Conclusion
There is so much a combo cooker can offer to you. When it comes to steam baking, the Dutch oven is your best friend. Regardless of your ingredients' quality or baking skills, dutch ovens will do the magic for you. With the valuable methods and tips provided above, you can now start your bread baking journey by baking bread in a Dutch oven. For beginners, you can follow a recipe that can help you create the perfect tasty bread in your kitchen like a master baker in the comfort of your home.







Leave a comment
All comments are moderated before being published.
This site is protected by hCaptcha and the hCaptcha Privacy Policy and Terms of Service apply.