Overview
One of the most enjoyable things on your next campaign trip is to make Dutch oven biscuits. They require little preparation, and the cast iron dutch oven creates uniform heat distribution to guarantee that every biscuit in dutch oven is wonderfully fluffy and cooked to perfection.
The beauty of baking biscuits in a Dutch oven pan is that you may cook biscuits without being constrained by the oven, allowing you to prepare your goodies at home and cook them quickly.
Combine salt, sugar, and two cups of self-rising flour in a sizeable stainless mixing bowl. Once the crumbs are visible, cut the shortening and melted butter and add them to the mixture. Then, while stirring, add buttermilk to ensure that all of the ingredients are incorporated.
Allow the dough to rest for at least 2 to 3 minutes. Lay the dough on the working surface and roll the dough to an even thickness of about 13 inches. Using the edge of a round glass, make circle cuts to create the shape of the biscuits.
How to Make Dutch Oven Biscuits
Ingredients to Use
- 2 cups of flour (self-raising)
- 2 tablespoons of soft butter
- 1 1/4 cups of buttermilk
- tablespoon of slat
- 2 tablespoon of sugar
- 1 tablespoon of melted butter
Dough Preparation
In a sizeable stainless mixing bowl, combine the salt, sugar, and two cups of self-raising flour. The shortening and liquefied butter should then be chopped and added to the mixture until pea-sized crumbs appear. Then, add buttermilk gradually while stirring to ensure the ingredients' complete incorporation. Remember not to over-mix the ingredients. Give the dough at least 2 to 3 minutes to rest. This will enable the ingredients to be uniform and the baking soda in the self-raising flour to work effectively while baking.
Using a biscuit cutter, knife, or flat surface, lay out the biscuit dough and then use the rolling pin to spread it evenly, to a thickness of about 13 inches once it has rested. If you will bake them later, store the cookies in a container; otherwise, continue to the recipes for Dutch oven biscuits in the baking procedure.
Baking Procedure
Before you place the Dutch biscuits in the oven to start baking, ensure to preheat the oven up to at least 167 degrees Celcius, and if you are baking outdoors, ensure the coals are grey hot. At least 7 coals should be placed in a circle below the Dutch oven. Save about 19 coals for the lid.
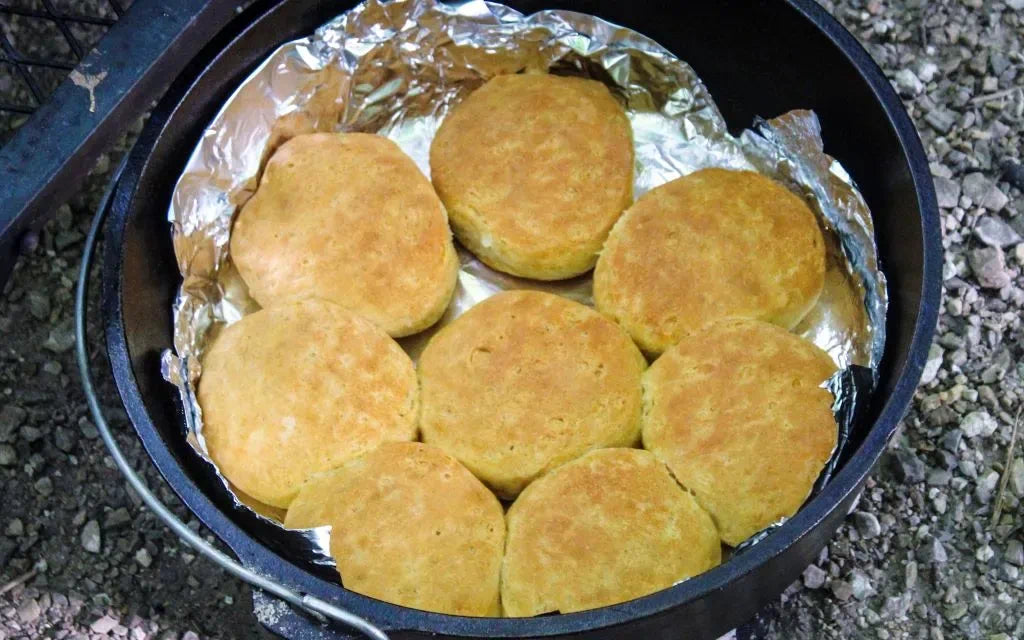
Then, spray oil lightly in the interior of the oven and then lay the Dutch biscuits inside. The biscuits can make contact, but not so closely, to prevent them from rising correctly. If you are baking outdoors, you should equally distribute the remaining 19 coals on top of the lid of the Dutch oven.
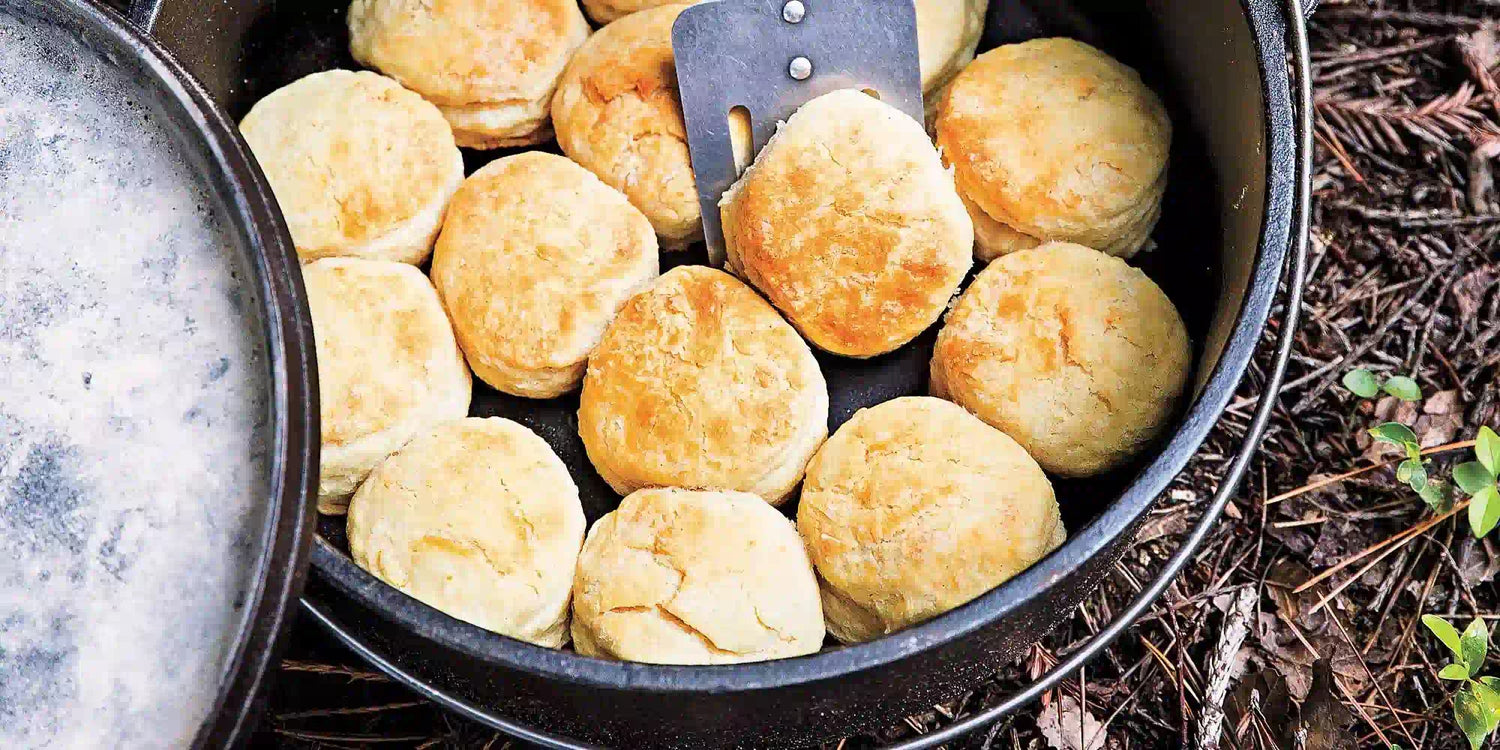
Bake the biscuits for 20 to 30 minutes, rotating the Dutch oven frequently to prevent scorching. When the biscuits are well risen and golden brown, they are done. Keep in mind that the Dutch biscuits will continue to cook for some time in the Dutch oven even when you take it off the heat. You can serve the biscuits with your preferred garnishes.
Tools You Will Require For The Recipe
You will need essential tools and equipment to bake the Dutch biscuits successfully. The following are some of the equipment:

Cast Iron Dutch Oven
The cast iron Dutch oven is an ideal piece of equipment needed in the baking process. However, not all Dutch ovens can handle the heat in the oven, so it is best to buy a suitable one. For instance, using the imarku Dutch oven is the best option since it can handle extreme heat due to its four-layer superior enamel. Learn more about the buying guide on Cast Iron Dutch Oven.
Pros of the Dutch Oven
- Best quality and patent design: the equipment is handcrafted using top-quality materials that will ensure the baking process runs smoothly. It also adopts a distinctive square aspect design that can handle a reasonable number of biscuits.
- Special enamel coating and chip resistance: its internal enamel material is shock resistant, which prevents chipping, while the external enamel is scratch resistant and built for durability.
- Heat retention and moisture distribution: it has superior heat retention and ensures moisture is evenly distributed between the food. It also contains a self-basting lid that helps to circulate moisture and replenish heat in the biscuits to produce tasty outcomes. Additionally, the lid design helps prevent oven chipping by minimizing air pressure differences.
Cons of the Dutch Oven
- Baking takes time: you have to be patient while using a Dutch oven for baking since the heat has to penetrate through the thick enamel layers.
- Heavy: the oven weighs around 16 pounds, making it heavier than other related equipment, and it can only handle a few biscuits to bake depending on how many biscuits you want to bake simultaneously; therefore, it can also be time-consuming.

Measuring Cups and Spoons from Oxo
You will also need measuring cups and spoon sets to measure some ingredients such as salt, baking soda, sugar, and other spices. The ideal measuring cups are from oxo because their sets can with all the measurements ranging from ¼ cup up to 1 big tablespoon. Additionally, they are created to give high accuracy of measurement.
Pros of the Measuring Cups
- Durability: the measuring cups have been constructed with robust, long-lasting steel that has a long service life and is easy to clean.
- Measurements: the measuring cups include a set with every size needed. Additionally, the measurement indications have been engraved permanently on the handles to ensure you will accurately measure the ingredients.
- Magnetic handle: the magnetic handles of the measuring cups make them easy to use, for you can remove them one at a time and keep them stored together.
Cons of the Measuring Cups
- Accuracy: Although these items may be standardized, that does not indicate that the standards have been applied in practice. Try experimenting and comparing the quantity you receive if you have various measuring cups.
Stainless Steel Mixing Bowl
You will also require a stainless steel mixing bowl where you will combine and mix all the ingredients needed to bake Dutch biscuits. Stainless steel mixing bowls are preferable because they increase your kitchen’s adaptability and functionality since they can be used for preparation, mixing, stirring and expert dough kneading.
Pros of a Stainless Mixing Bowl
- Easy to clean: the advantage of the stainless steel mixing bowl is that it is easy to clean compared to other bowls, such as plastic mixing bowls. Additionally, most stainless mixing bowls are lightweight and are manufactured to be strong, and are freezer and dishwasher-safe.
- Sizes: the mixing bowls come in various sizes where you can opt to buy in sets to have flexibility in terms of the number of biscuits you want to make.
Cons of Stainless Mixing Bowl
- Wearing out: the only disadvantage of using stainless mixing bowl is that in the long run, it may form scraps while whisking and mixing the ingredients.
Classic Wooden Rolling Pin
Rolling pins are crucial equipment that will be used to evenly flatten the Dutch biscuits among other kinds of dough such as pasta and pie dough. Different varieties of rolling pins differ from the material used to make them. Using a classic wooden rolling pin is advisable for it is efficient in so many ways.
Pros of Wooden Rolling Pin
- Usefulness: wooden rolling pins are well-liked because they are practical and straightforward. As a result, they are a fantastic option for amateur and inexperienced bakers.
- Even dough thickness: you can simply even your dough in a uniform thickness by using a large wooden rolling pin. Additionally, cleaning wooden rolling pins only takes a few minutes.
Cons of Wooden Rolling Pin
- Heavy: a hardwood roller can be pretty heavy, especially when you are using it to roll small Dutch biscuits. Additionally, the wooden rolling pin may need routine upkeep, just like most wooden kitchen items.
Nutritional Value of Dutch Biscuit
One Dutch biscuit contains at least 6l kcal of energy that will keep you active until the next meal. Although, it is not advisable to eat more than 8, for it will raise the carb net. The table below shows the nutrient it offers and its value in grams:
|
Type of nutrient |
Quantity in grams and milligrams |
|
starch |
0.0g |
|
fiber |
0.2g |
|
Net carbohydrates |
8.4g |
|
proteins |
0.7g |
|
Saturated fat |
1.0g |
|
Vitamin A |
0.0g |
|
Vitamin D |
0.0g |
|
sodium |
50mg |
|
Glucose level |
4.0g |

Frequently Asked Questions
How can I use a Dutch oven for cooking with the ideal heat distribution?
Every 7 minutes, turn the Dutch oven's pan and lid 90 degrees in the opposite directions to ensure cooking biscuits in dutch oven evenly. Additionally, rotate the pan and cover to prevent any hotspots from creating burns or undercooked biscuits since the biscuits will bake on both sides.
On a campfire, are frozen Dutch biscuits possible to cook?
If you'd instead create your biscuit dough ahead of time at home so that it's ready to bake when you go to the campsite, you might wish to freeze the dough in tiny amounts to carry them and bake when you get there. Yes, your Dutch biscuits will bake wonderfully even if they have been frozen. For the biscuit dough to cook perfectly, it is an excellent idea to let it defrost before setting it over the fire, but you could also drop it right in the oven. As they bake, make sure to observe them.
Why are Dutch ovens preferred for baking Dutch oven biscuits?
The versatility of Dutch ovens makes them valuable to both professional and home cooks. It is suitable for baking Dutch oven biscuits because it can withstand high heat and its non-stick characteristics help the biscuits not to stick while baking. Additionally, the enamel and cast iron combination enable you to bake without worrying about having to remove a stubborn, stuck-on mess.


Leave a comment
All comments are moderated before being published.
This site is protected by hCaptcha and the hCaptcha Privacy Policy and Terms of Service apply.